Showing posts with label #projectcamper. Show all posts

Tuesday, 9 May 2017

Project Van Life pt4

We started to build and build we did, the designing of the van we had been doing for some time, we had to change a few things with the addition of our lovely long dog, however we were happy with what we put together and enjoyed masking the tape down to measure out the space.

We had gone back and forth about having a bed that stays out or one that rolls back to being seats. We decided that if we had the bed out all the time it would allow us to relax on rainy days and allow Socks the chance to get up and look out the window/s. We also felt by having the bed out we could have storage underneath for baskets, clothes, fridge etc,
We also know for Socks to travel she would need a space, her spindly legs are so long that without a contained area she would fall all over when in transit. We felt by making a box behind the seats it give her a travel style cot where she could still see us and look out the window. When camped up we could then use the box for storage, placing a lid on it and a cushion for seating area. 


We used various size ply for the bed, and 3x2 timber for the frames. My Step-pa came around to help and really shifted us on with the building, it felt exciting seeing it all come together.


We added some hatches into the bed, the longer one for storage and the smaller one for access to the battery. We then placed the table and storage underneath the bed. For us the table wouldn't be used to eat from, it would be more of a storage spot when cooking and a bedside table when in bed. We wanted to not take bags into the van so made a storage spot for baskets in which our clothes would go in. 


We made a cupboard out of timber frame and pallet, i had seen the idea on the interweb and felt it would fit perfect with our style of van. We took the pallet apart, sanded it down then covered it in teak oil. Sam then put the boards together and put hinges on to make three doors. The top we used old scaffold board, which Sam sanded right back and again we stained with teak oil. The big cupboard space will hold the water and waste water and the calor gas. The smaller cupboard would be for cups, teapots and all the cooking equipment. 


We hadn't measure the top, doh, and at one point worried we couldn't fit a two hob stove on, however Sam found an old stove called a Tilly Trojan, he found a guy selling them on gumtree and we got a brand new one that fitted perfect. We also loved its retro style. For the sink we bought a bowl and are going to put a plug hole in and a hand powered tap. 


Decorating came next and i looked in the shed for what i already had, i picked the yellow from our bedroom wanting something bright and then used magnolia for the kitchen area as we are tiling above the sink/stove area. I also used blackboard paint above the door so we could write good camping spots and notes on.

I had made curtains so we got them up and the obvious maps had to go in. I got a great children's map that sat brilliant against the yellow. 

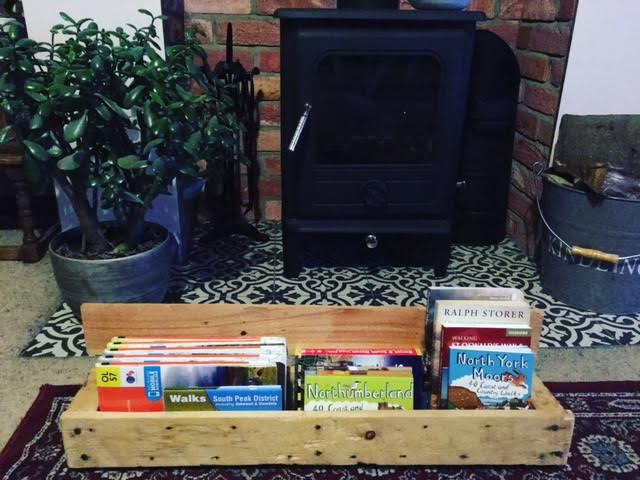
We made a couple of shelves again out of pallets, one for books and the other sits above the sink area with tea/coffee etc on. 


I need to get some better photos of it all complete but will do that in another blog.

Enjoy, any comments, questions feel free to ask, we found so much helpful information on the internet and wanted to be able to share that back. 


Tuesday, 28 February 2017

Project Van Life pt3

We had a really good weekend in the van this weekend, Sam has been working like a trooper as i haven't been well enough to be in there, however this weekend i found the energy to get outside and really help out and it felt great. Sam has been working on the electrics, he seem's to read about it day and night and this weekend we started to wire everything up (i will do another blog about electrics). I got on with insulating using the loft roll as mentioned in Van Life pt2 ~  https http://claire-yvonne.blogspot.com/2017/02/project-van-life-pt2.html and started to make templates for the ply that will cover the insulation. 


I also started working on the ceiling, Sam had started it but it needed to be finished and it was a job i could do, (electrics i wasn't going near), the panels on the ceiling were actually going to be used on the floor, however we decided there were too femur and felt they would bring some more light and colour to the van if we put them up top. A friend of ours owns the http://welovewood.org/ wood recyling yard and we were in love with these as soon as we saw them, loaded in the car, home they came and onto the van they were drilled. 


Socks even came out and visited us, she normally looks at the van then pootles off but this time she took her time and jumped on in, we were so happy, she took a good sniff around, posed for some photos and looked out the windows. 


Next stage is more of the ply boarding going up, finish electrics then we will start building the frames for the furniture. We know the layout so it's just starting to build.


Tuesday, 7 February 2017

Project Van Life pt2

We have been back out on the van again, Sam has taken on more of the role with me, due to a lot of work being a one man job and i feel i am just getting in the way, however as Sam stated i am crafting for the interior of the van so i am still working, this made me feel more comfortable about sitting watching grey's anatomy whilst crocheting. 

We are still insulating, it's a long and boring job and has many many layers, in my last blog post here http://claire-yvonne.blogspot.com/2016/10/project-van-life.html we started cleaning and prepping the van, if that was not boring then insulating has definitely taken over, we had to first add the outer insulation, we used thermal wrap (Wickes) which was placed on the inside of all the van, celing, walls, floor, we also placed some in the front cab and placed an old yoga mat on tap for a bit extra comfort (before we place the carpet down), we stuck it all down with high temperature adhesive (amazon), which stank and was super strong, we had to cut set lengths to fit around the wheel base (inside the van) and inside certain compartments along the edges. 


Sam then added the framing using timber, the framing will hold the ply, we then started placing space loft roll (Wickes) on top of the thermal roll to pad it out and ensure the heat is kept in good and proper for when the ply goes on top. We used a spray adhesive to start sticking the space loft roll on, however some will just be placed behind the ply walls, this weekend will be more insulating and hopefully the walls will start being placed. 


As for whats happening inside the house, i started crocheting squares a few years back, i decided when travelling in 2014 it would be a good thing to learn and allow my hands to keep crafting, the blanket has been a slow process, however i decided it would be a great van blanket so i have now started focusing more on it rather then it being a 'work in progress' ~ so here it is just a few snaps as a taster. My idea is the crochet squares with the brown outside will be the outer layer then a mad mixture of colours in the middle, there is no order to this blanket, it's been made by so many different wool's in so many different countries that it literally will be a mixture of madness, however it will be treasured as it will be my first crochet masterpiece. 


Saturday, 8 October 2016

Project Van Life

So for those of you who didn't see our sneaky instagram posts a few months back, we got lucky and my cousin sold us his van, she's a beast, massive to say the least, a big tall lass. Its been a dream for some time to renovate and create our own camper and we are now in the process of being able to spend time working out where and how we begin, well we started....

Boards down, cleaning begins, design planning!

Windows are being fitted Monday then it's insulating and frame fitting...